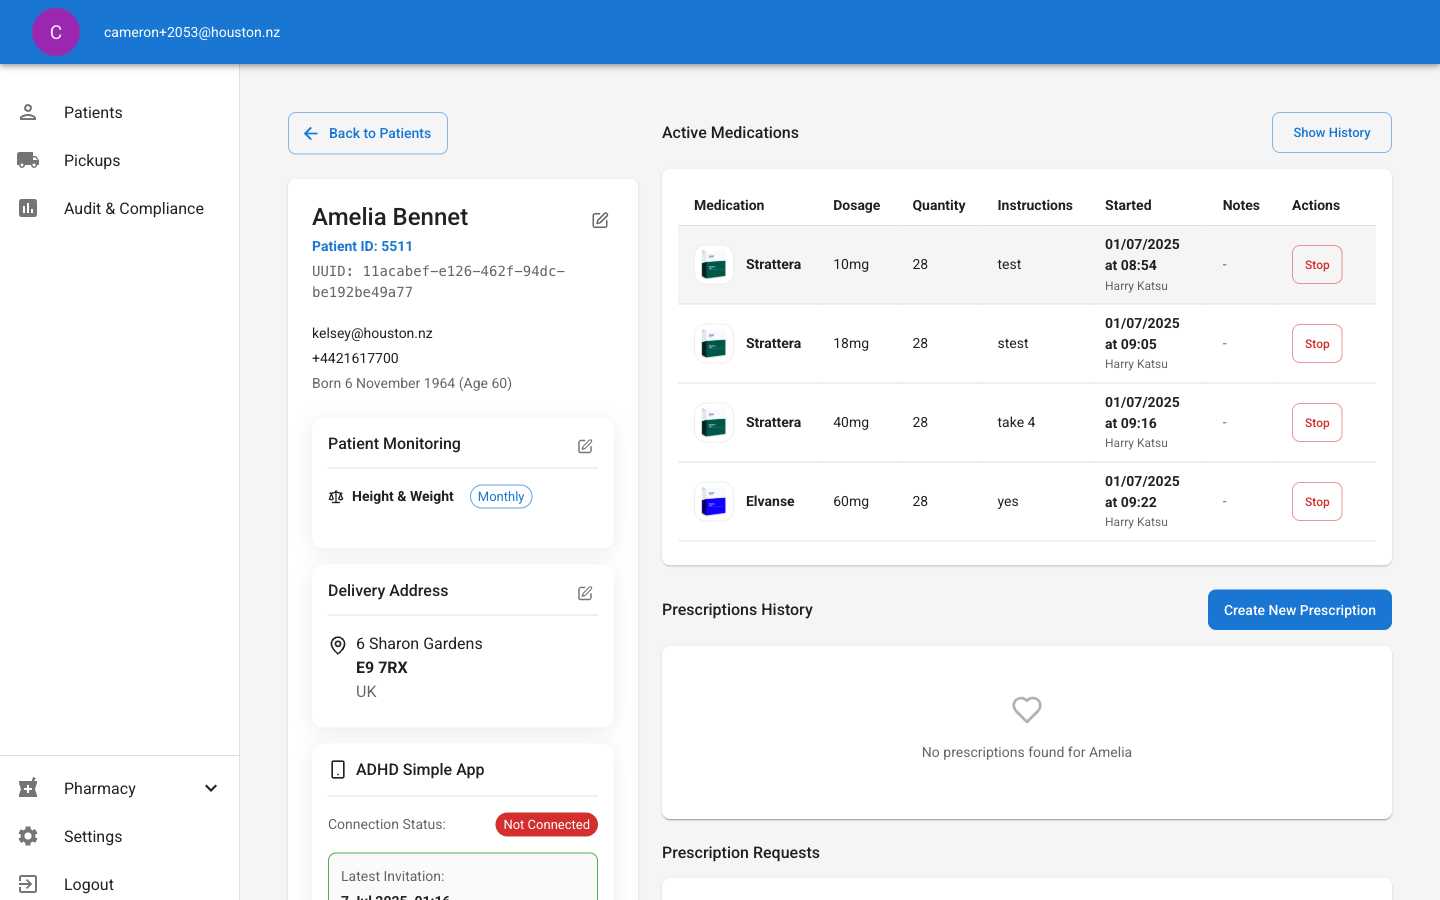
Locate Create Button
On the patient detail page, scroll down to the Prescriptions History section and click the Create New Prescription button.The button is located below the prescriptions table and provides access to the full prescription workflow including:
- Medication selection from approved formulary
- Dosing instructions and quantity specification
- Real-time prescription preview
Open Prescription Dialog
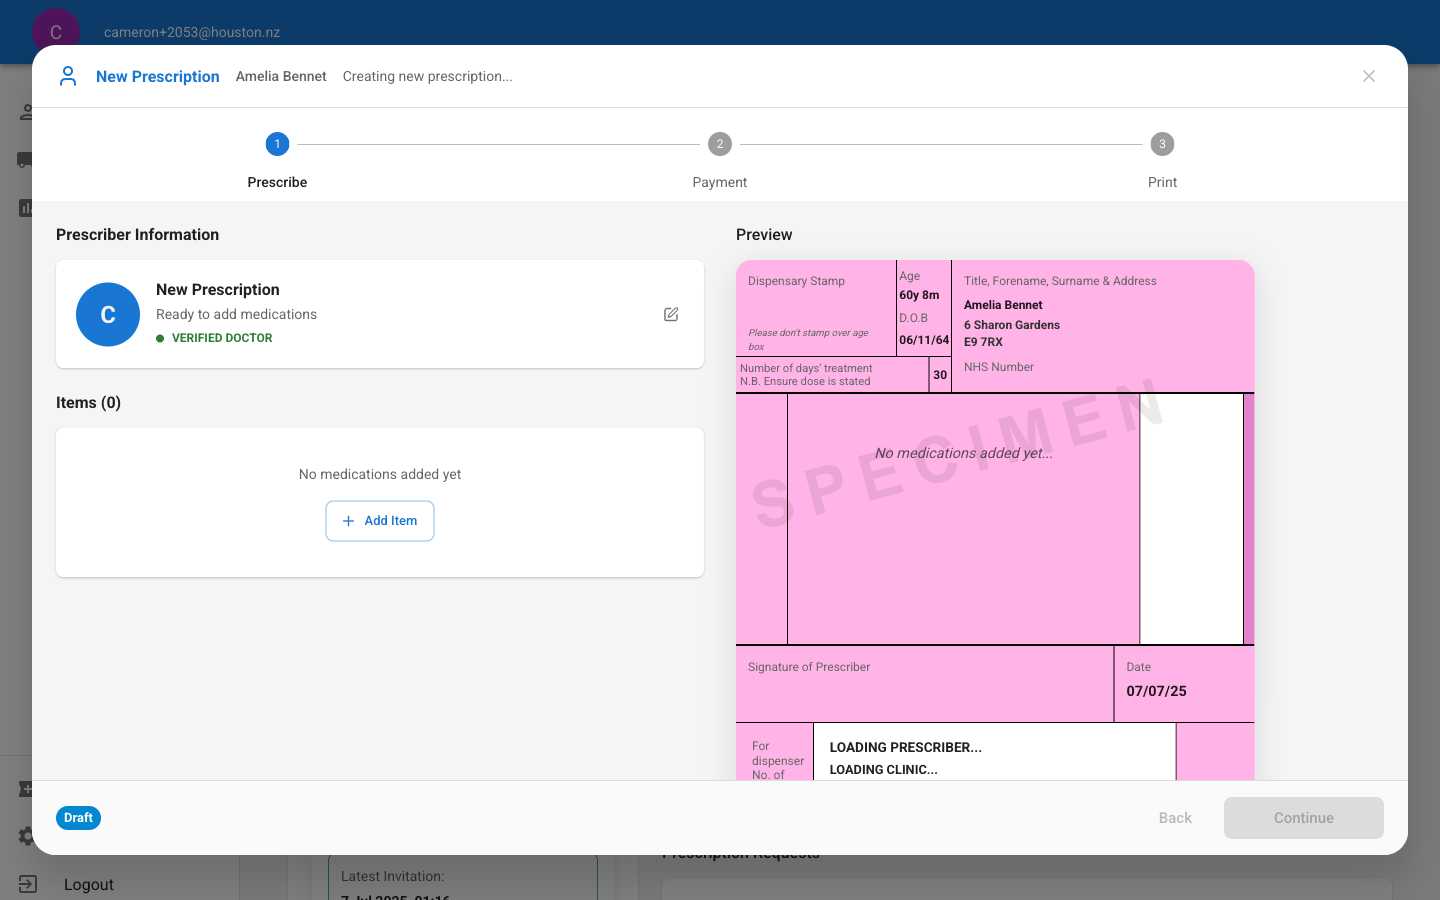
- Prescribe - Add medications and instructions
- Payment - Process prescription fees
- Print - Generate final prescription
Select Medication
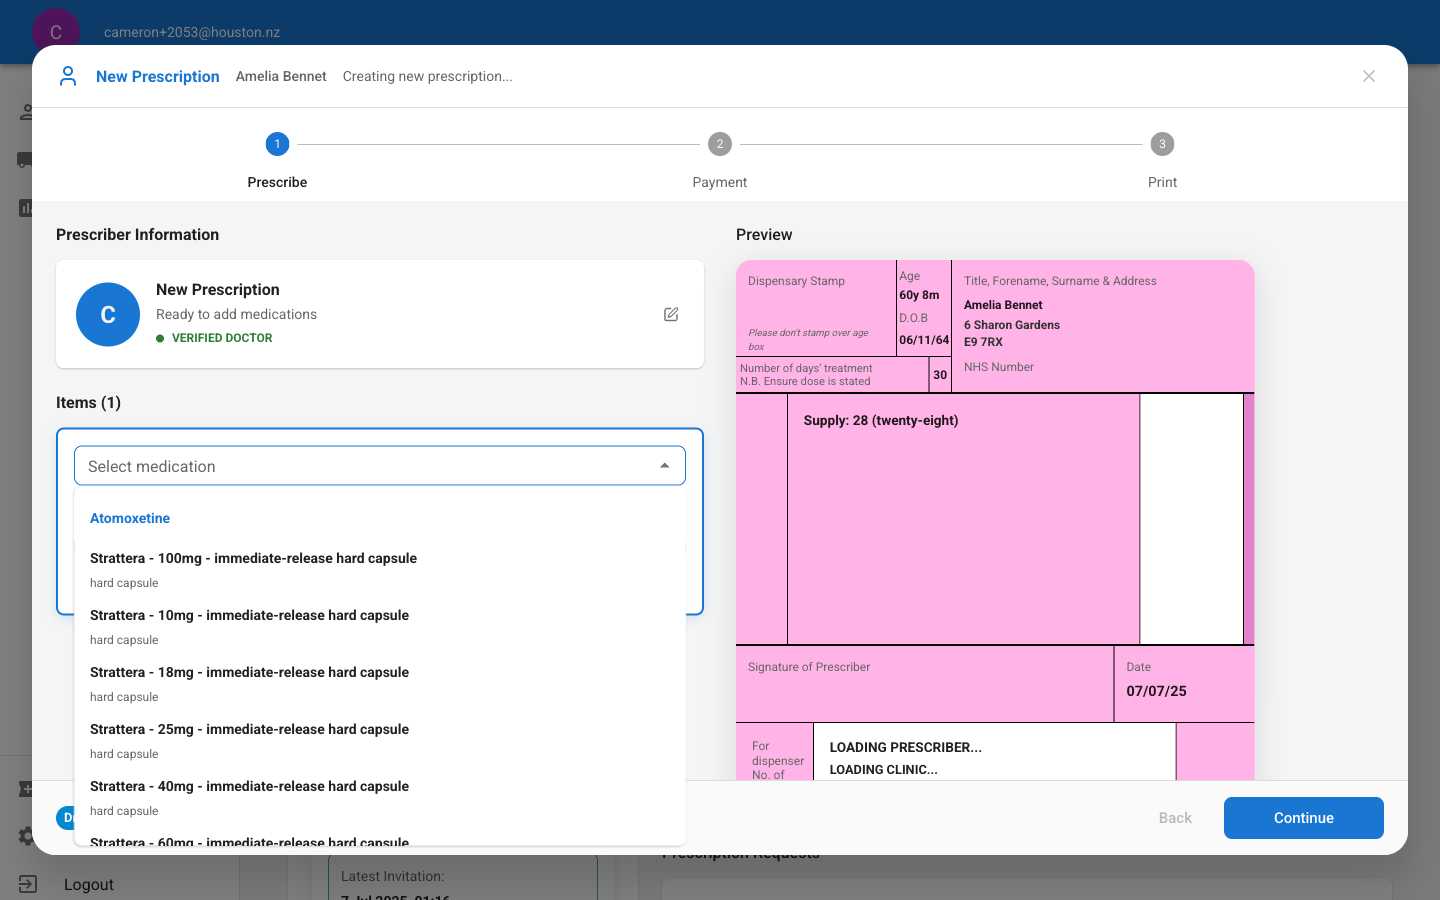
- Atomoxetine (Strattera variants)
- Dexamfetamine (Amfexa, Dexedrine)
- Guanfacine (Intuniv XL)
- Lisdexamfetamine (Elvanse, Elvanse Adult)
- Methylphenidate (Multiple formulations)
Complete Prescription Details
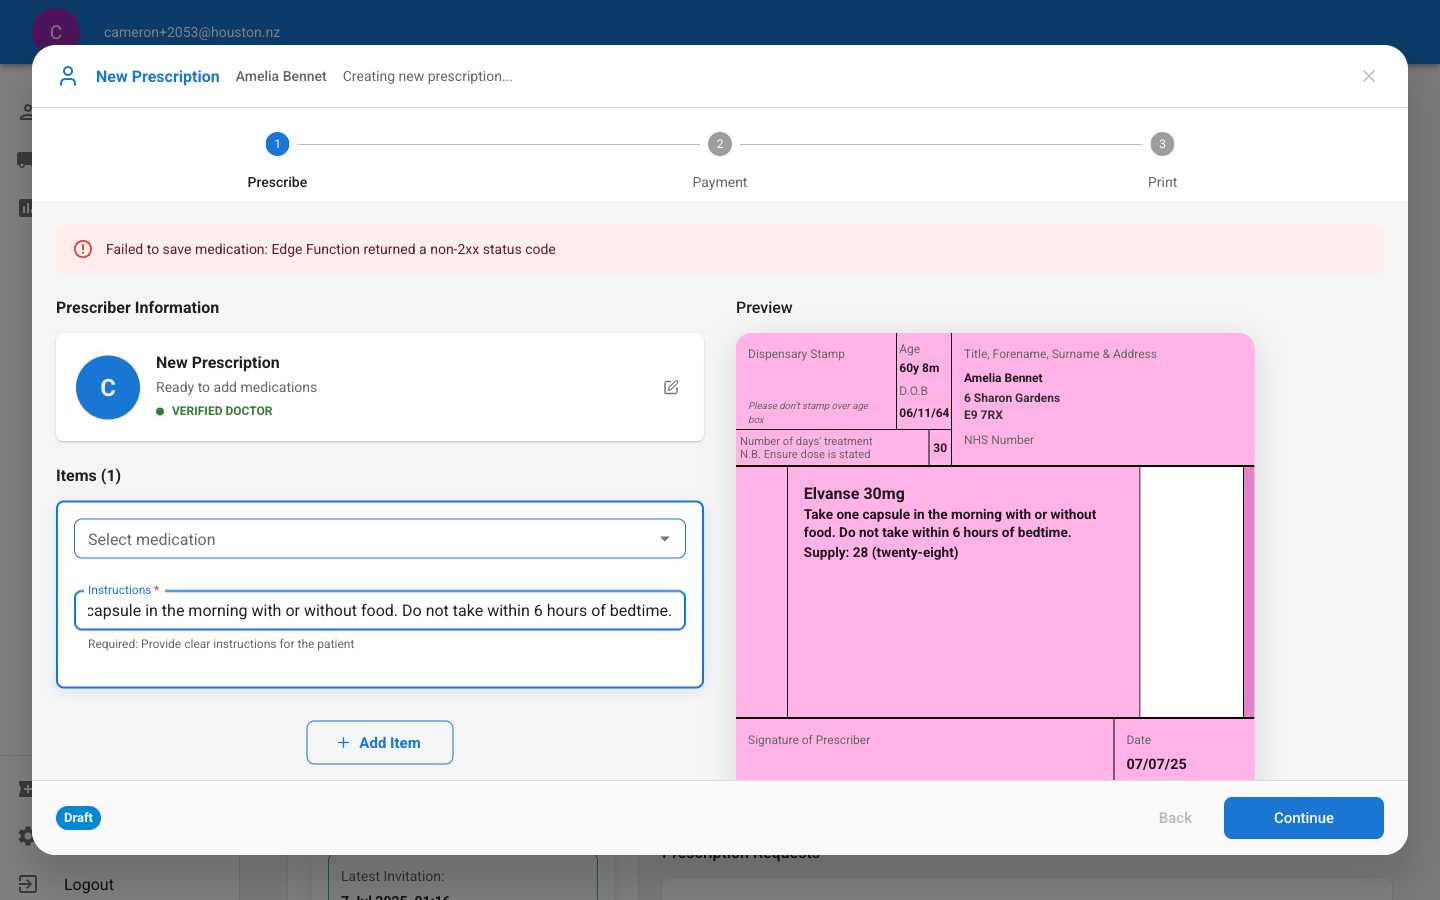
- Add Instructions - Provide clear patient instructions in the required field
- Review Preview - Check the prescription preview on the right shows correct details
- Verify Information - Confirm patient details, medication, and dosage are accurate
- Continue - Click Continue to proceed to payment processing
Common Issues
If you encounter the error “Failed to save medication” or “No prescription ID available”:- Refresh the page and try creating the prescription again
- Ensure all required fields are completed
- Contact technical support if the issue persists
Patient Notifications
Email and Push Notifications: Patients receive notifications via email and mobile push notifications when prescription status changes (e.g., when you approve a prescription and it changes from “draft” to “prescribed”), not when the prescription is initially created. This ensures patients are only contacted when there are meaningful updates requiring their attention.
- Prescribed - When you approve and sign the prescription
- Dispensed - When the pharmacy prepares the medication
- Dispatched - When the medication is shipped to the patient
- Delivered - When the medication arrives at the patient’s address
- Email notifications (enabled/disabled)
- Push notifications (enabled/disabled)
- Specific notification types (per prescription status)
- Marketing communications (separate opt-in required)
app.adhdsimple.co.uk, while push notifications appear directly on their mobile device with relevant prescription details.